Designing a Sensor
- Open Sensor Setup application.

- Enter in sensor information in Sensor Information, Test Reference, and Test Points:
a. Category refers to the Sensor Type. Entries are case sensitive (i.e. CHARGE and Charge will appear as two separate categories).
b. Manufacturer refers to the manufacturer of the sensor. Entries are case sensitive (i.e. DYTRAN and Dytran will appear as two separate manufacturers).
c. Part Number refers to the designated part number for the sensor.
d. If an entry has the Category, Manufacturer, and Part Number identical to a sensor already in the database, the most recent entry will overwrite the identical sensor.
e. Test points may be deleted by selecting the empty cell in the left column, which highlights the values in that row (Figure 2A). Pressing the delete button on the keyboard will delete this row of values.
f. Test points may be added by entering values into the blank row at the bottom (Figure 2B).
g. Fields marked with a red asterisk (*) must be filled in (Figure 3).[/et_pb_text][/et_pb_column][/et_pb_row][et_pb_row _builder_version=”3.0.47″ background_size=”initial” background_position=”top_left” background_repeat=”repeat”][et_pb_column type=”1_2″ _builder_version=”3.0.47″ parallax=”off” parallax_method=”on”][et_pb_text _builder_version=”3.2.1″]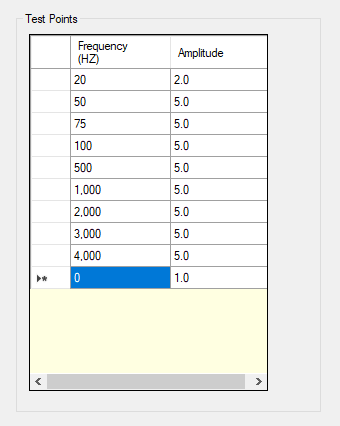
Figure 2A. Deleting row of test points
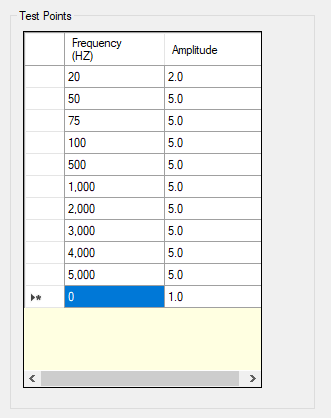
Figure 2B. Adding row of test points.
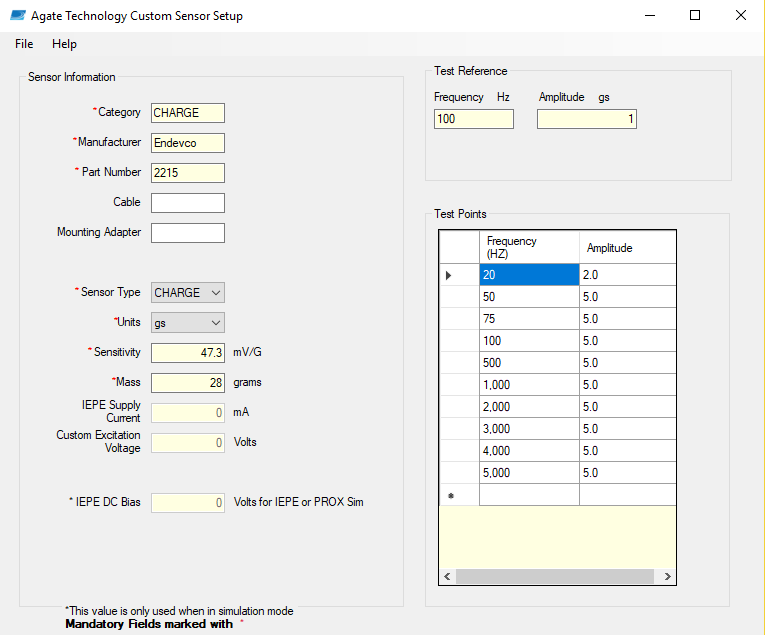
Figure 3. Example of a custom sensor setup.
Saving a Sensor
- When finished with a custom sensor setup, select File -> Save As
- Save the file on a computer, as well as to a USB stick.
a. Save as type: setup files (*.json, *.jsn)
b. Name file so that it can be distinguished from other custom sensor setups (Figure 4)

Figure 4. Example of a custom sensor setup file saved to computer.
Uploading a Sensor
- Begin with an Agate calibration unit that is turned off.
- Take USB stick with saved custom sensor setups and insert it into the USB port on the calibration unit.
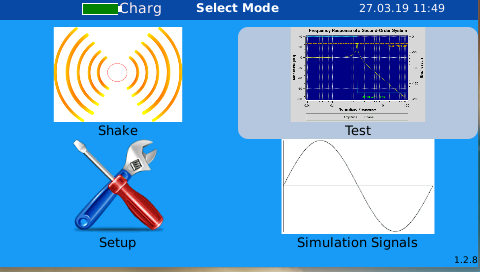
- Turn on the calibration unit, then select “Test” on the main screen (Figure 5).
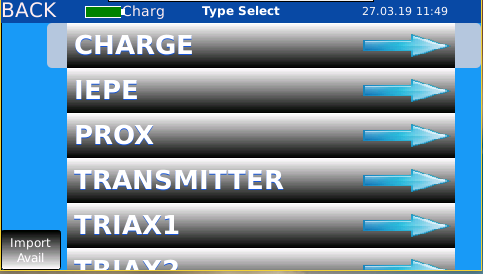
Figure 5. “Test” appears in the upper right quadrant of the main screen. - “Import Avail” will appear in the bottom left corner of the screen, indicating that an import is available from the USB stick. Tap “Import Avail” to import custom sensors (Figure 6).
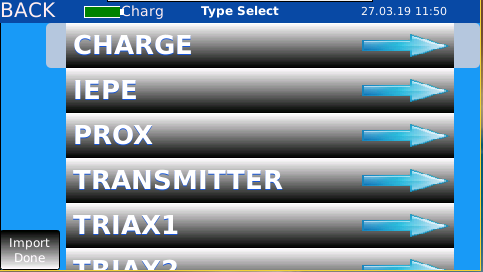
Figure 6. “Import Avail” appears in the bottom left corner. - Once import is finished, the screen will indicate that the import is done (Figure 7). To view sensors, first select a category type.
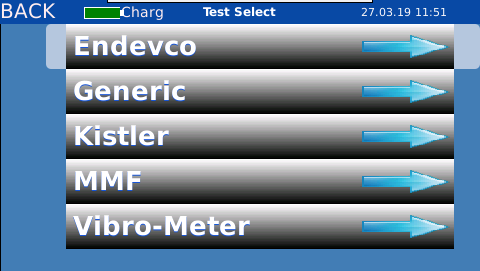
Figure 7. “Import Done” appears in the bottom left corner. - Then select the desired manufacturer from the list (Figure 8).
Figure 8. After selecting the CHARGE category option, the following manufacturers are displayed.
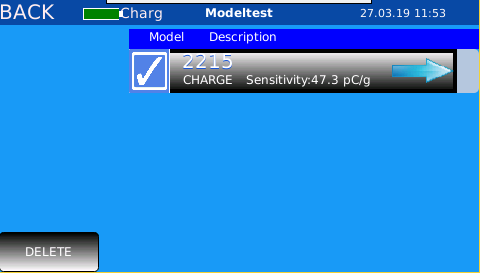
- Sensors belonging to the category and manufacturer selected will appear. A sensor can then be selected for testing (Figure 9).
Figure 9. After selecting the Endevco manufacturer option, the custom sensor imports are displayed.